Hi ya !!

Hi ya!!
How are you readers ?
the sunny bright is how I've got today and what a beautiful day!
so it's my pleasure to popping and say Hi!!!
Today I have a card for sharing, because today my friends at MDUC have a new challenge with Tic-Tac-Toe board I will give my card for inspiration there and I choose : 
(using) Metal -  Wet embossing - Clean & simple
and here is my card,

This is a multi greeting card, that you can using on Birthday, Congratulation or just for saying hello to your friend! 4" x 6" is my fave or the note card shape, and for me this shape so easy to send by mail. On the sunny day who doesn't like water ??? it seems I need to take a bath many times a day because of the hot weather .. so, what the relations to my card .. yep! I think for water coloring background to make the sky :)

Before I'll let you know what I did for water coloring the sky, here I show you where is the metal I used. That is craft wire with black color .. I use wire to replace the balloon's thread 
Do you see the cloud ? it was another fun way to put some clouds on card.


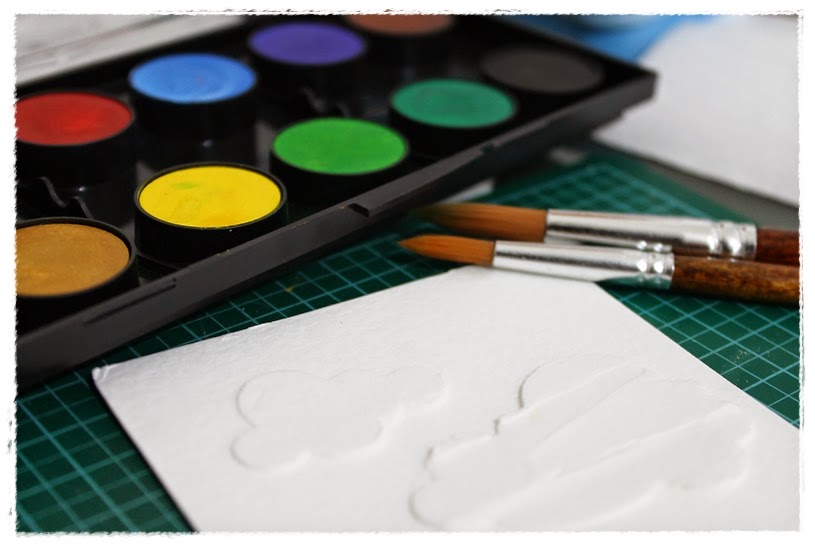
I cut a piece of scrap thick paper using Pti dies - clouds but here I used the negative to have my homemade stencil and then stencil over it using embossing paste. here I didn't cover it all smooth surface but I made some texture on the bigger cloud


you can noticed them ? different surface between the small cloud and the big one. You can do all for smooth or all for textured is up to you :)


this step is the most step I love! .. yey!! time to watering .. LoL!!!
using big brush I covered the surface with lot of water to make them so wet.
I use Faber Castell water color palette, but any water color you may have can be use also.


Blue color is mixed from blue and white , I adding more and more water on it! start out the watercolor on the cloud's edge and let it flow their own by moving the paper .. let it flow... and flow....... use a heat gun to dry faster or simply let it dry for hours. You can see the beautiful water coloring result when they are completely dry!
Please note : Using the water color paper that have minimum thickness 140 lb / 300gsm and be generous with water :)

After my background ready, I just simply place it on my base card,
also made a great place to give a word ..
"Hi ya!" is from Pti stamp and it was so cute don't you think ?? so perfect for saying Hi! especially on the beautiful sunny day :)

Okay, that's for me today. Thank you for stopping here and I'll see you again!

Hugs,
Yulis

Sneaky Tilda framed with flowers :)

Well hello there, my lovely readers ..

I'm back here because I've miss you so!!

I am sure all of you had chance to see this cutie pie from the latest Magnolia stamps released on last spring. And now the summer will be arrive soon, isn't it ?? are you ready ??

okay, today I share my latest one with Sneaky Tilda and here is my card..


Still on the spring garden and those flowers around Tilda makes me happy anyway :)
I loved the hot colours I used on this one and I am focusing on the gorgeous Tilda, framed on beautiful vintage square from Magnolia DooHickey dies!
oh my ... I am so thrilled when Magnolia released the nesting dies as whenever Pauline designed the dies they always so vintage and I love them!!


Water color on card making so popular nowadays and I think that was fabulous, which is I can play with some water and mediums to show up my feeling, my passion, and so on.
The flowers traps the cute Tilda and gives a lovely effect which shows up best for the weather today here, hot sunny day :)


Although I've keep my second layer which is the base card, clear and clean .. but not so clean ;) I sprayed Gosse Bump to make texture and paint with white acrylic color around it .. some crackle paint here and there and voila! yup .. I love the effect :)


I noticed I never use green too much because honesty I ... only love green tea but not  green color for a card LoL!!!
The beautiful script was from KCK clear stamp that I love their vintage design so much!


well oh well .. say this and that but I haven't write about the mediums .. oops!!!
Tilda colored with distress ink as usual, flowers are drawn by me :)) with Faber Castell water color pencils and Darwent Graphitint for the leaves. Lavender painted with FC gelatos as well as the lime on the edges.
I just blend everything with brush and clean water and doing all I want!! yes.. I love the process, seems like I found my happy time :))

here some toys I used :


Of course there’s always lots of fun using some mediums like toys .. at least for me :)
and I hope you will get some inspiration from my post! Just feel free whenever you do your painting proses, crafting time and the most of all is just be Happy!!
nothing going false on art and water coloring.. that water flow will do the beautiful finishing for you!

I would love to thank you for your visit and will see you again.
Have a wonderful day!

Love,
Yulis

I'm glowing on the dark!

Hello peeps!

I don't want share with you the weather here .. 
because I don't want you to join me at the super hot weather .. LoL !!
yeah ... poor my aircon nowadays and I just can't imagine my electricity billing next moth because I use the aircon all day long!!!
in the evening still warm and when the night fall .. phew!! it's little bit cool :)
oh ... see .. I took a picture with the super bright background?? according the situation I think .. ha ha


okay, today I have play with some fun medium that I found them not use for some times! I grab my super cute image from Magnolia - Bunny Prince from the Lost and Found collection 2013
I almost lost him but thanks God I found him finally :D
I just coloring with my usual medium - distress ink and once it was completely dry then I paint him with "Glo It" paint from Deco art.

I need a cute present for someone cute this weekend and I don't want to make anything else but a simply cute bookmark! for a book lover ;)

pictures below show you how my cutie turn on like neon on the dark ..


First, I took the picture with all lamps are on, then I left just 1 small bulb and finally I turned off all the light and he is glowing!!
maybe I must to take another picture with a dark background to show you how glow he is,


Yayyy!!! .. my Bunny Prince turn on like a neon on the dark and he doesn't left his cutie face :))
Thanks to my friend Vera, she is ask me to take photo on the darkness ;)
(note to my self, I have to learn more for photo technique)

I can't possibly think of an easier way to make a fun background at this moment so I choose another way to create the image more fun.


Open my door .. back to the day light !! ha ha
the last picture shown that I didn't let the back from my book mark just plain, the beautiful ribbon still from the Ribbon Girl and simple knot make it more gorgeous!

and don't know I suddenly wrote so much words today?? hope you didn't get bored and I'll see you again on the next post.
Thank you for stopping by and Have a great day!

Hugs,
Yulis


Special Hugs from Elsie ..

Hi reader!

Today I want to show you the cutest lamb from the latest collection from Magnolia rubber stamp..
Tilda with Elsie the Lamb - Animal of the year 2014
I stamped her on Langton paper , coloring with distress ink
and put lots of love in every way ..
here my card for you to enjoy;


The card is 6" by 4.5" , covered with gorgeous paper from Magnolia same collection
I love love love the fabric I used here .. they come from Ribbon Girl: Dusky Blue button twine and 10mm Denim Blue square check ribbon.
IRL, the are seriously beautiful!!


I mixed my embossing paste with glimmer mist - moonlight and covered rarely with stardust glitter.
Edges are inked with Smokey slate and I love how they turn gently vintage.
words are LOTV

List of my distress ink :
Skin : vintage photo and tattered rose
Hair : old paper and walnut stain
Tilda's dress : stormy sky
Elsie : pumice stone , Elsie's bow : barn door and walnut stain


Thank you so much for your visiting
I wish you enjoy your day and lots of loves from me ..
See you again soon!

Bug Hugs,
Yulis